Supplier List
Purpose & Function
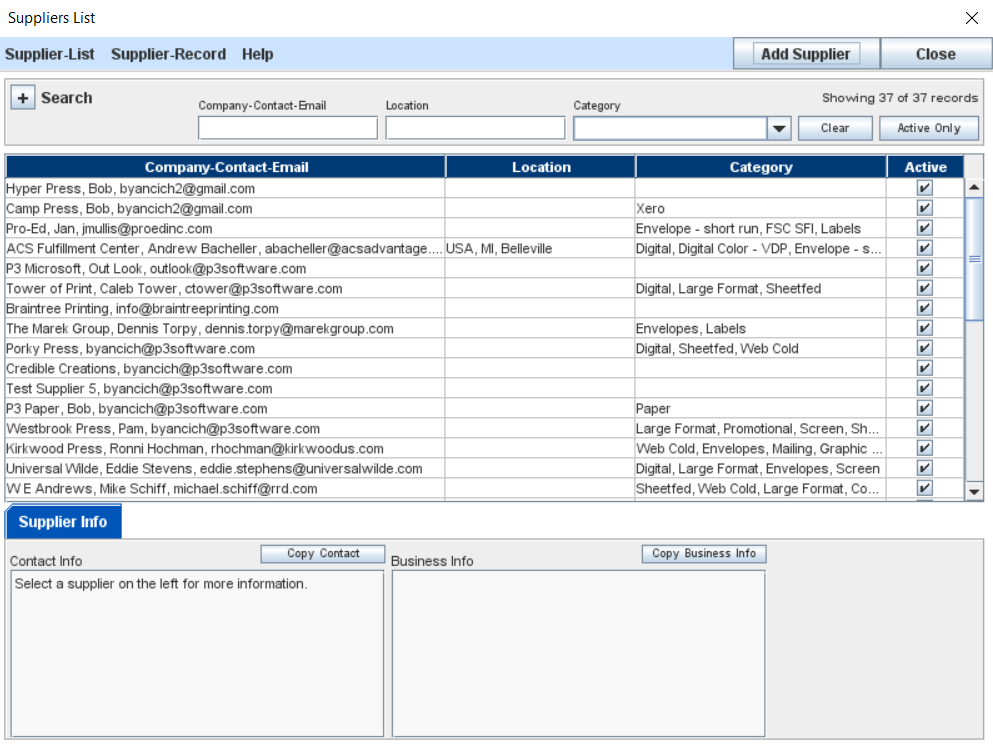
The Supplier List window shows a list of suppliers that can be selected to bid on jobs. In demo mode the list will be empty (except for one test supplier P3Software adds automatically). The user can quickly build a list of their trusted suppliers using the Add Supplier button and Edit Supplier Menu button.
GETTING STARTED TIP: It is not necessary to add all your suppliers at once before starting to use the system. You'll see that it is easy to add new supplier records at any time, especially when selecting bidders for a job.
The Suppliers List is accessed in two ways:
- Supplier List Mode - This mode is used when accessing the Supplier List from the Main Application window. It gives the user general access to the list for viewing and editing.
- Supplier Selection Mode - This mode is used when accessing the Supplier List from the Job Master window / Select Suppliers button to select bidders for a job. This gives the user a simple tool for finding and assigning suppliers to a job.
Sorting Suppliers
The gray column headings at the top of the Suppliers List columns are sorting buttons. Click once and the list will resort based on the data in that column, in ascending order. Click it again to reverse the sort order.
Searching/Filtering Suppliers
The filtering controls consist of a Search utility. Open the Search utility by pressing the + button. Then select the parameter to search. By typing text into the field the Supplier list will be narrowed to only those records that begin with the text you typed. The Category filter on the right-hand end has an option list containing all the category key words and phrases assigned to suppliers on the list.
Adding Suppliers
To add a new supplier (printer) to your list, click the Add button; and the Supplier Record Details window will appear. Enter the specific supplier information, and click Save & Close to save the record.
NOTE: We strongly recommend that all fields on the Supplier Record Details window be entered: Company, Contact, Email, etc. This information is displayed in various communications and reports throughout the program.

Editing Suppliers

To modify information on an existing print supplier, highlight the supplier, which will open the Supplier Info tab at the bottom of the window. Click on the Edit Supplier button to open the Supplier Record Editor window. You can also choose Edit Supplier from the Supplier-Record menu.
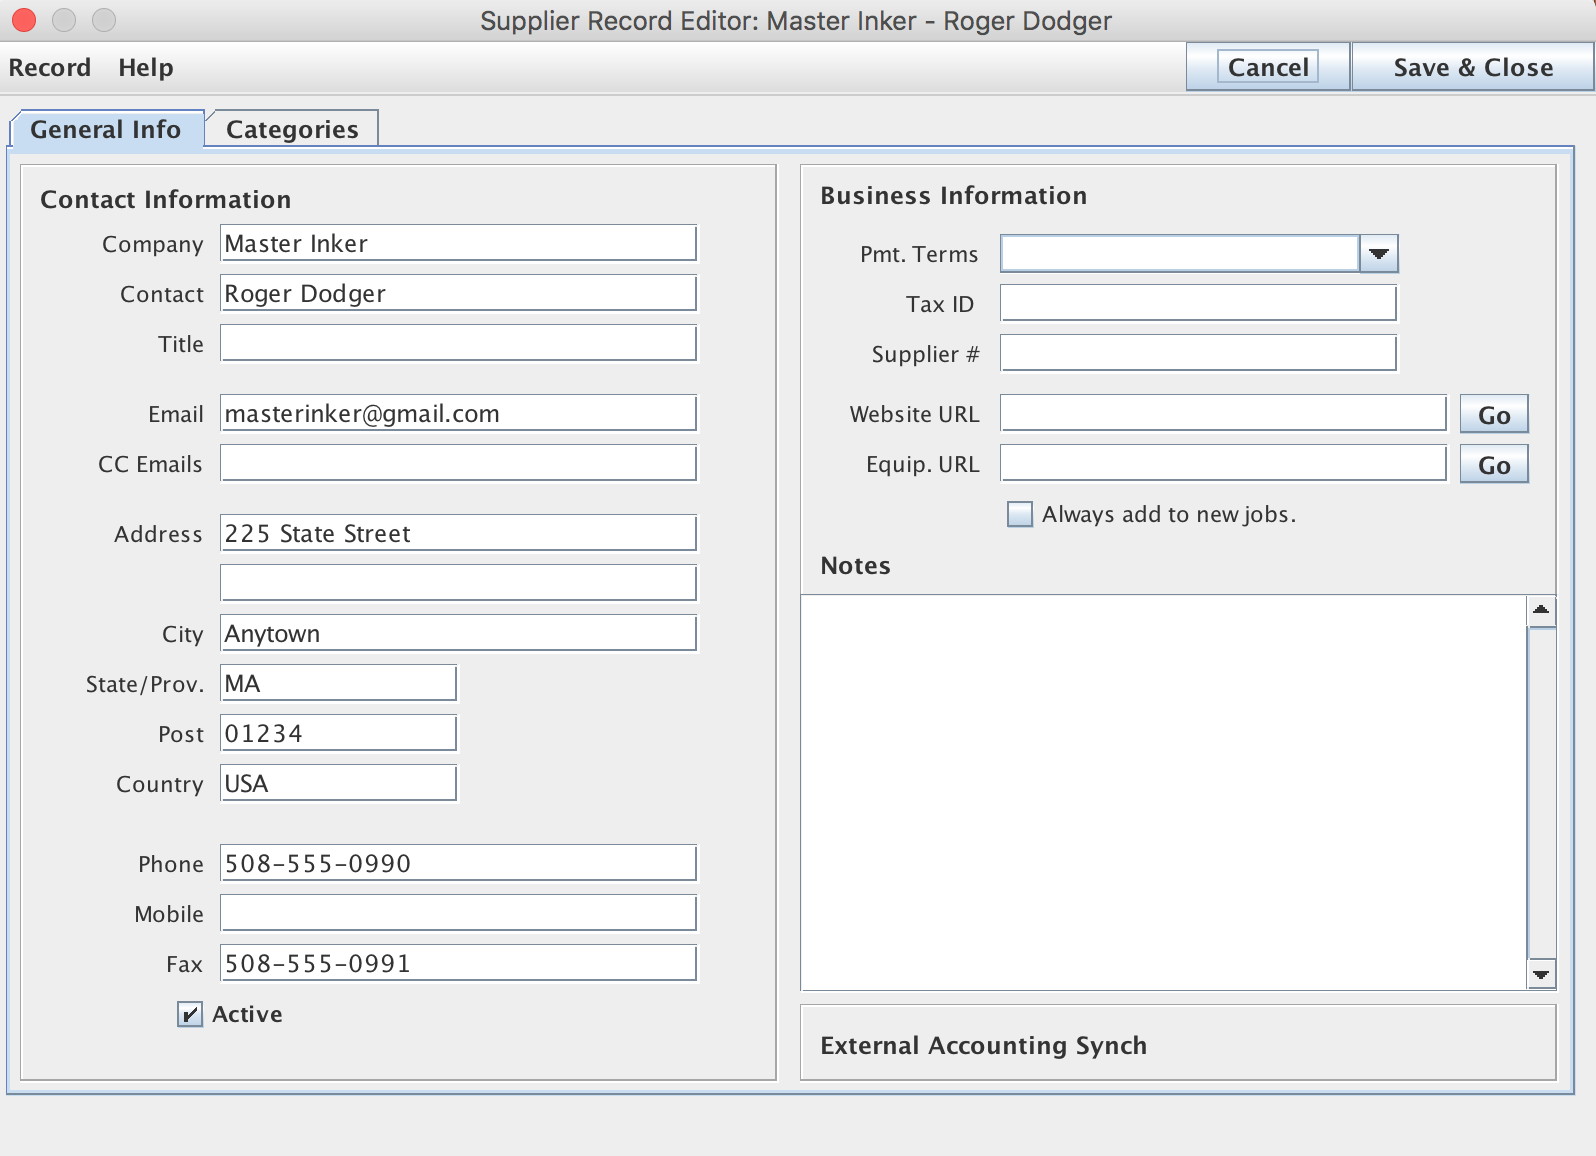
Now you can add or amend information to this vendor file as you wish. You can also choose which categories that supplier should be in. Click the Save & Close button to save the changes.
Copying Suppliers
You can copy a supplier by highlighting that supplier and then in the Supplier-Record menu choose Copy Supplier. this will create a copy of that supplier that you can edit as needed.
Deleting Suppliers
To delete an existing print supplier, highlight a suppler and click on the "Delete Selection" menu item from the Supplier-Record menu. The Confirm Delete window will appear. Click the Yes button. The vendor will be deleted from your list of print suppliers. This action will not affect your historical records. All previous activity for a deleted supplier will remain intact as part of the individual jobs.
Importing Suppliers
Supplier contact information can be imported into the Suppliers List from many common sources using the Supplier-List menu / "Import Supplier Data" menu item. Data exported from MS-Outlook or MS-Outlook Express can be imported directly. Information in standard V-Card files can also be imported directly.
Data from other sources can be imported by converting it to tab delimited text. Files of this type can be prepared using MS-Excel or other spreadsheet programs. For these delimited text files the column names must match the P3 system specific set of column names and their ordering. This format can be obtained by using the "Get Import Template" menu function on the Supplier List window. The resulting tab delimited text file has the column headings just as they should appear for importing.
Import Template Instructions:
- The Import Template file provides an easy way to prepare data to be imported into the P3Source system. The file contains a set of Column labels in a Tab-Delimited text file.
- The Import Template is a Tab-Delimited Text file that can be opened in Microsoft Excel or other applications to facilitate adding data to the import file.
- The column labels in the first row are used by the import system to map your data into the correct locations in the P3Source records. Please preserve the column labels when preparing your import file.
- The file must be saved as Tab-Delimited Text before importing into P3Source.
- All columns are optional (but you really should always include the Company, Contact and Email). If you do not have data to populate a particular column, leave it blank or delete the column from your import file.
- Please note the first two columns and the columns to the right of "Account Code" (column 20) are internal P3Source data elements. They are generally not used unless you are updating existing P3Source records.
- Duplicate Email Addresses: The import system will detect email addresses that duplicate addresses already in the system. To prevent creating duplicate records the duplicates can be easily deselected befor importing the records.
- Record Updates: If you want to update existing records you must first export them. The exported records will contain the P3Source IDs in the first column. Do not modify the IDs. You can modify the rest of the Exported data as you see fit. The Import process will detect the IDs and Update the existing records with your changes, rather than adding new records.
Exporting Suppliers
Your supplier data can easily be exported from the P3 system. From the Supplier List window select the Supplier-List menu / "Export" menu item. The data will be exported as tab delimited text. The file can be stored with either a .txt or .xls (allows direct access with excel) extension. You will be prompted to select an extension.
You can also Print the supplier-list from the Supplier-list menu.
Supplier Categories
Supplier categories can be edited from the Supplier-Record menu. You can either Edit Supplier Category or Delete Supplier Category.
Supplier Record Details
Purpose & Function
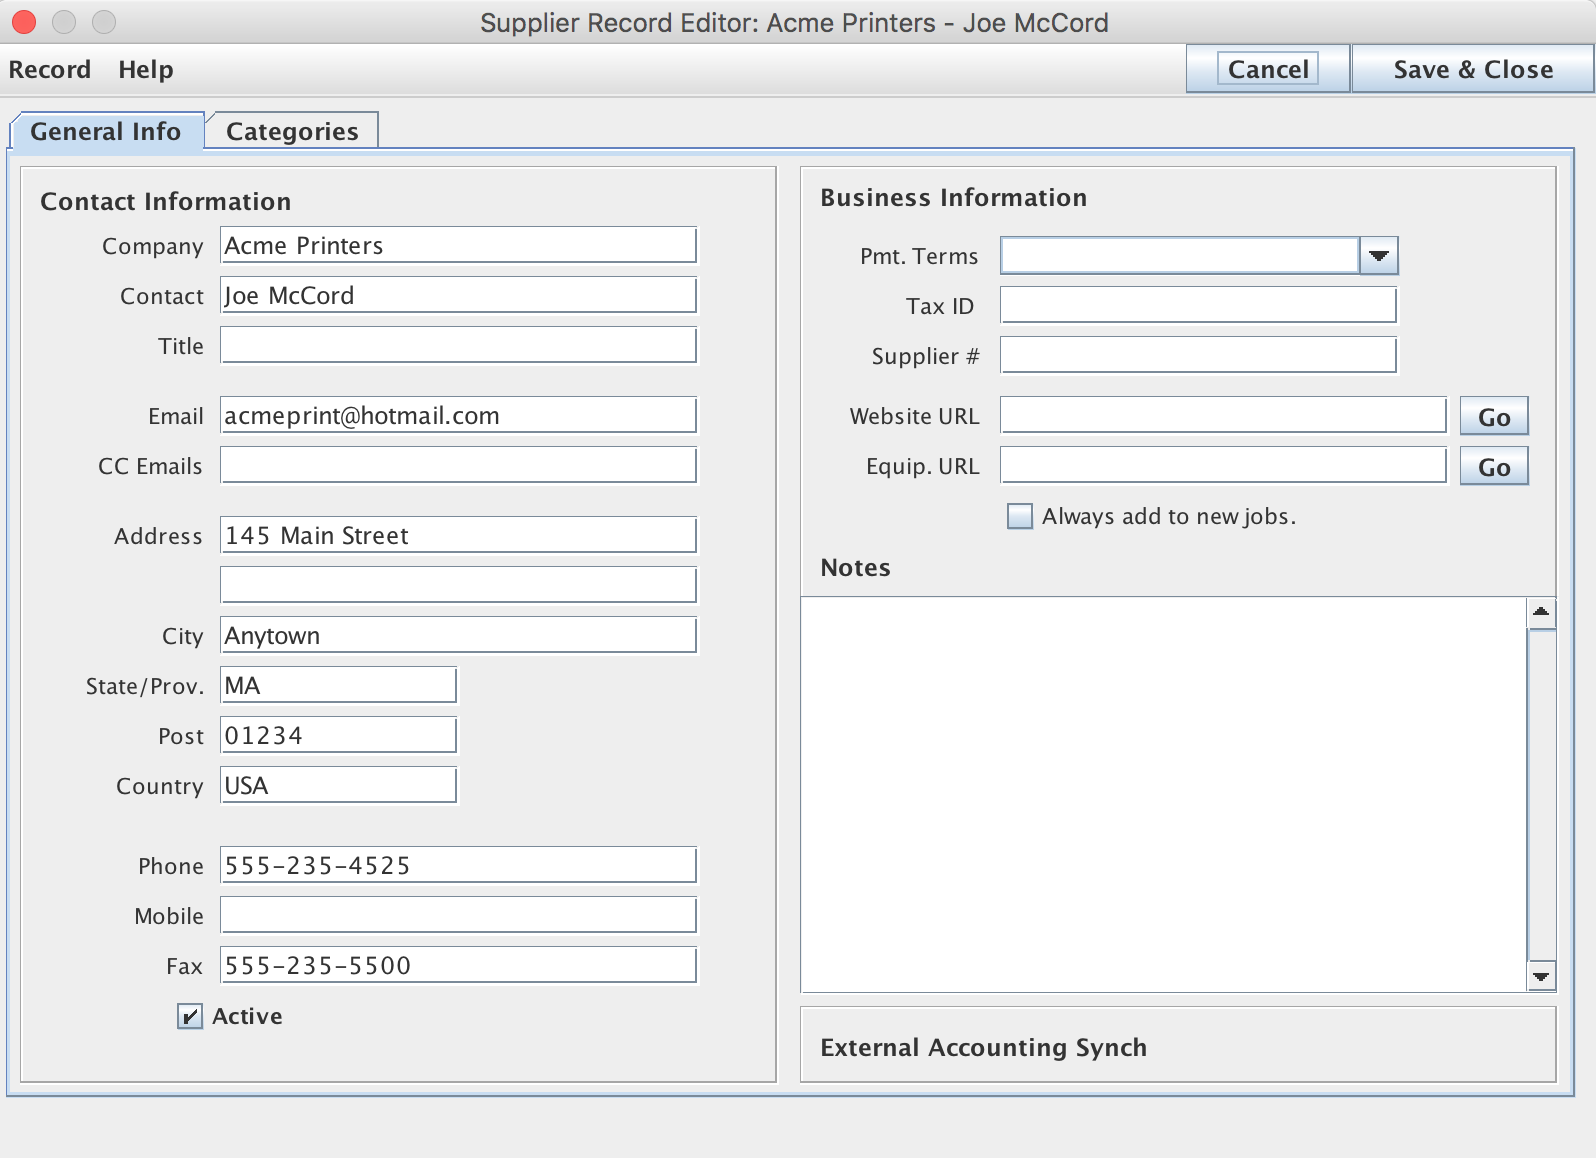
The Supplier Record Details window pops up whenever you click the Add or Edit buttons from the Supplier List window. This screen allows you to edit the data for the individual supplier records on your permanent Suppliers List.
The fields on the Supplier Record are used to label your Requests For Quotation (RFQs) and Work Orders. While it is possible to enter only the supplier's email address and then send him/her an RFQ, we recommend that you include enough information to properly identify the supplier in your documents. The same is true of your biographical information under the My Settings section.
When you finish editing the Supplier Information, simply click the Save & Close button, and the data will be saved.
Supplier Categories
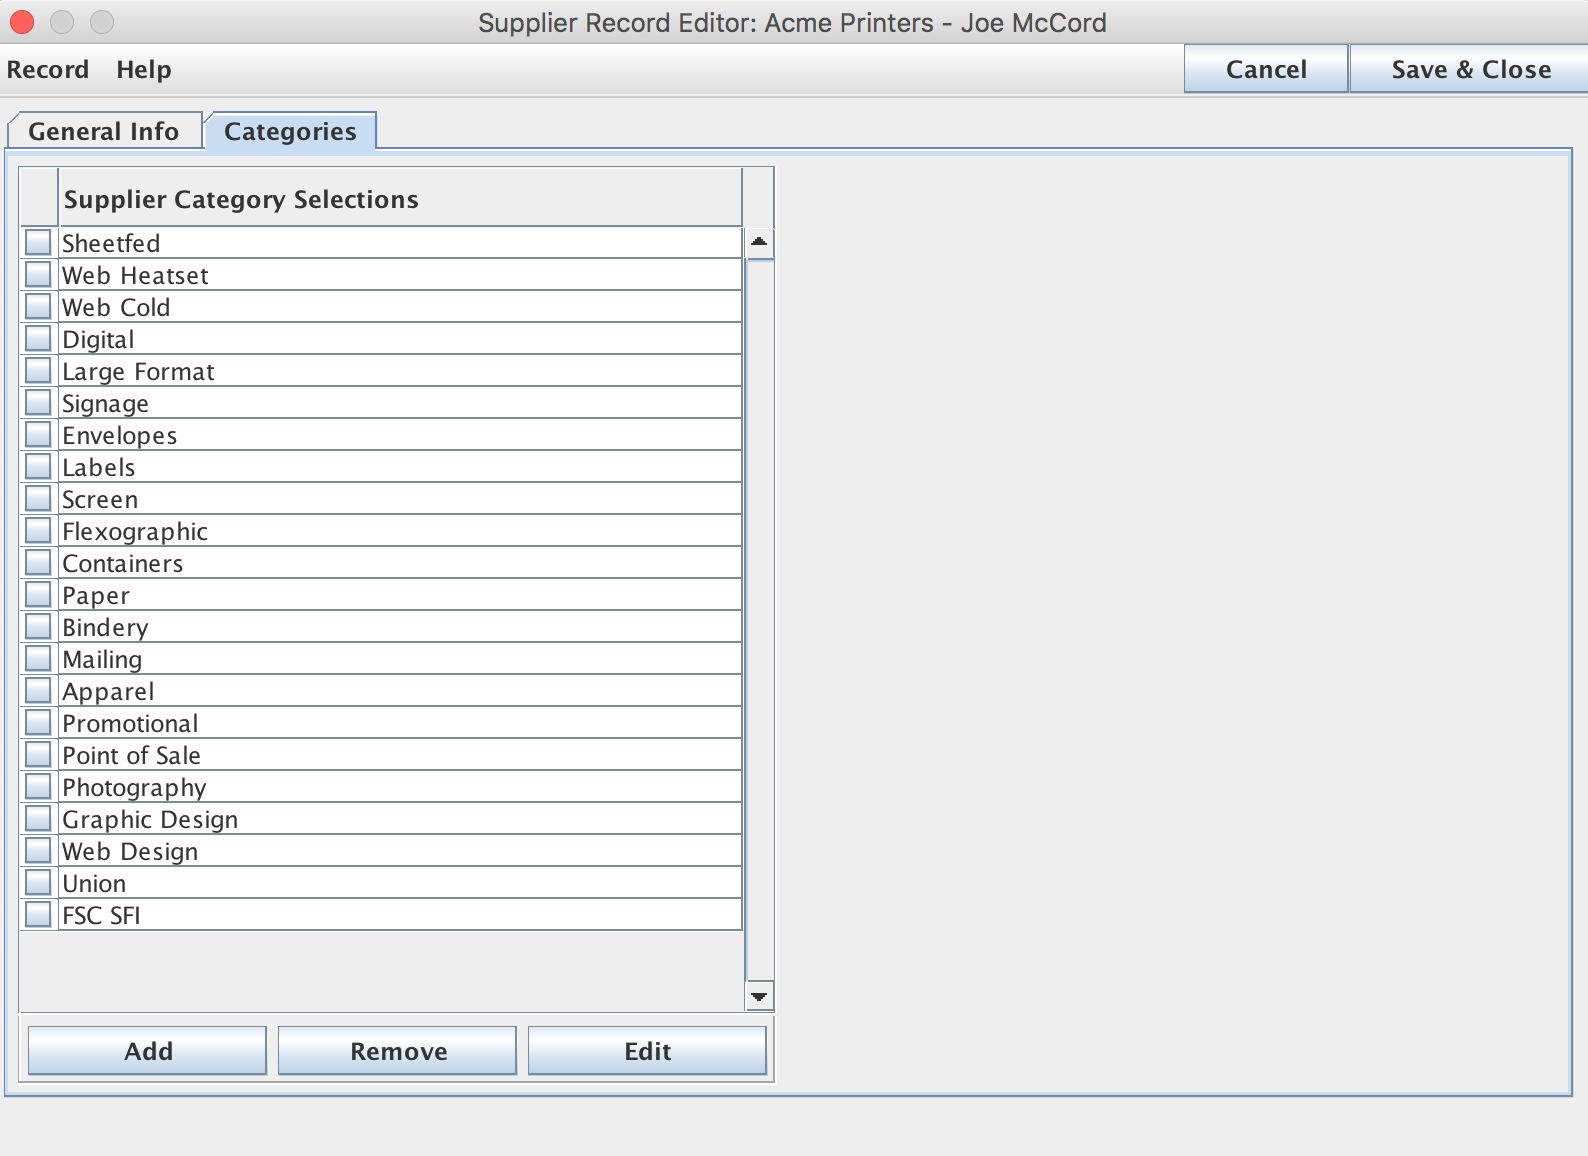
The Categories Tab is a very useful tool for managing your suppliers. Each supplier may be associated with certain categories or keywords, which can then be searched to find all suppliers in a certain category.
An unlimited number of key words or phrases may be placed in the Categories area. Each keyword or phrase should be separated from the others with a comma. The user can then search for suppliers by key word or phrase from the Job List window.
A Note On Supplier Data and Job Records
When suppliers are added to a job, their data is copied to the job record as is. That way even if you delete the supplier from your permanent record, the information will be retained with the job as long as it is in your archive. On the other hand, changes made to the Supplier Record Details after it is copied onto the job record will not be transferred to the job record.
Selecting Job Bidders
Selecting bidders is the step taken after Entering Job Specifications in the Job Work Flow, also known as the second step of Job Work Flow. The next step is Send RFQs.
Selecting suppliers for a Job
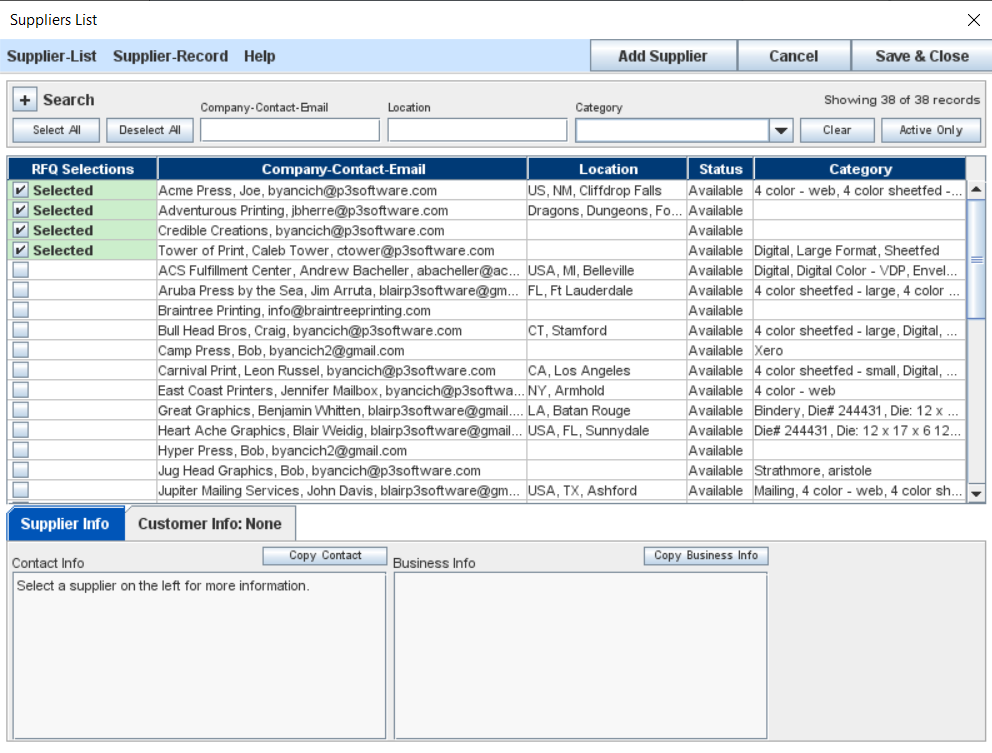
When you click the Select Suppliers button on the Job Master window, a special version of the Supplier List window will pop-up. This screen has two functions. It allows you to:
- Manage your permanent Suppliers. Adding, editing and deleting suppliers on your permanent list. This function is described in the main Supplier List help page.
- Select and manage the Suppliers for the job you are currently working on (listed under Bidders for Job).
The Suppliers List window appears and works much the same as the Suppliers List window that can be accessed from the Main P3Source Application Window. The bottom half of the Suppliers List window tab titled BCustomer Info now includes the name of the job selected and displays the information on the customer.
Adding a Supplier to a Job
To add a supplier from your permanent Suppliers List to the Bidders for Job list, simply click on radio button next to the desired supplier. The color will change to green and the word Selected will appear next to the radio box. This will add the supplier selected from the permanent Suppliers List to the Bidders for Job list. The supplier's information should then appear on the Bidders for Job list. The suppliers will also appear on the Suppliers Selected For This Job list on the Job Master window when you close the Select Suppliers window.
Deleting a Supplier from a Job
To delete a supplier from the Bidders for Job list, simply uncheck the selected radio box for the supplier supplier you want to delete from the Bidders for Job list in the lower lefthand corner of the Suppliers List window. The suppliers name will then be removed from the job record (but not the permanent list).