RateCards
What are RateCards?
RateCards allow you to save a set of prices from your suppliers and use them over an extended period of time or series of jobs. Creating a RateCard will allow you to create job orders and project proposals for your frequent printing needs without going through a separate RFQ process each time. Like the usual Job Work Flow, creating a RateCard will allow you to send RFQs to your suppliers with a range of quantities and a set of specifications, collect their bids, and compare their bids, but will store their prices for an extended period of time. You may then load these prices directly into your projects and jobs. If you have a frequently ordered or standardized item, consider making a RateCard to speed up the job ordering process.
About RateCards
RateCards, essentially, encapsulate four pieces of information:
- Specifications for an order
- Quantities, versions, and special information about that order
- A list of suppliers to be sent RFQs, and the rates they respond with
- A range of dates that the rates will be valid for
Once created and this information is filled in, a RateCard may be used to fill in this same information when appropriate in other parts of the system.
The RateCard Workflow
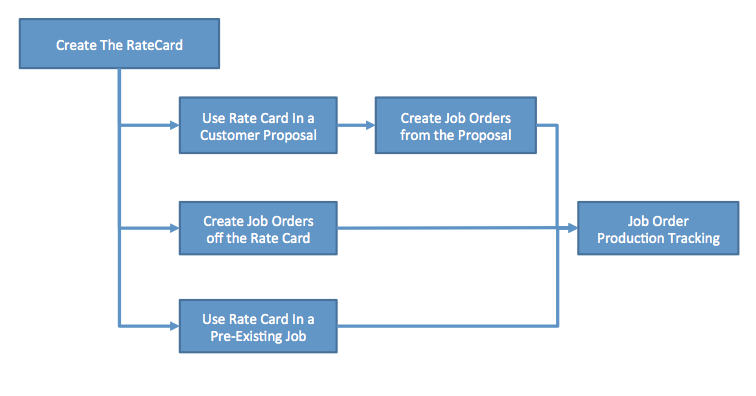
The RateCard process has two phases: first, creating the RateCard and gathering quotes from suppliers, and second, using the RateCard to create a job order or project proposal. In the first phase, the specifications for the job are created, and are sent in RFQs to suppliers. Suppliers respond with their bids, and the RateCard is complete. Then, in the second phase, a user can include the RateCard in one of three ways: creating a project proposal, creating a job order directly, or including the RateCard in a pre-existing job. Choosing to create a project proposal will create a new project proposal with the RateCard information (i.e. the specifications and pricing) already loaded in. Choosing to create a job order will bring up the Job Master Window, skipping the sending RFQs/receiving responses portion of the Job Work Flow, and bringing the user straight to the Compare Quotes & Award Job step. Finally, including the RateCard in a job is accomplished by selecting the appropriate option from the Job Master Menus, and will include the pricing data from the RateCard alongside any other bid responses.
Making a New RateCard
Ordering business cards would be one common example of when to use a RateCard. To begin, select New RateCard from the RateCards menu item located along the top of the main window. This will bring up the RateCard Manager Window. The RateCard Manager Window will open with the General tab currently active.
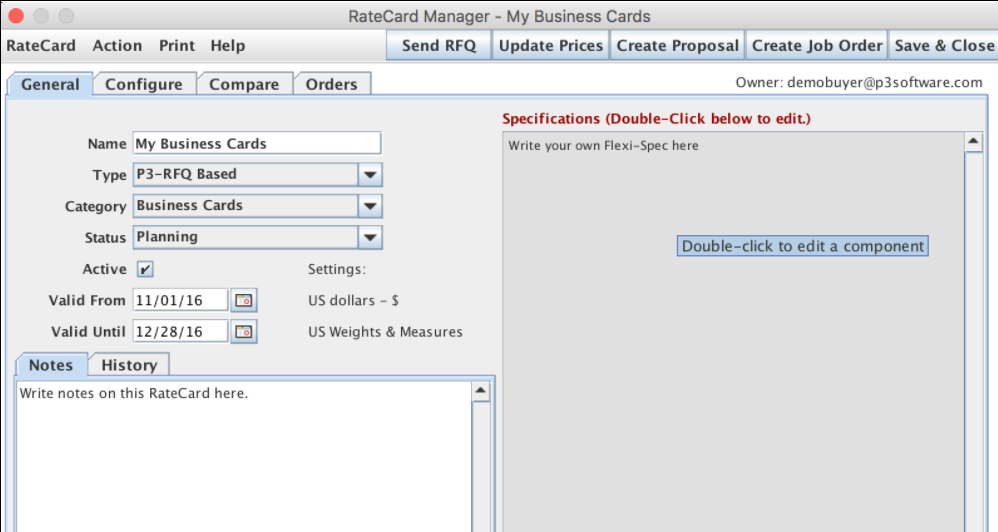
On the left-hand side of the RateCard Manager Window, enter the name of this item in the appropriate field. Next, select the type of this RateCard (in most cases this will be P3-RFQ Based), and the category (e.g. business cards, brochures, letterhead, etc.). Leave the Status selector and Active checkbox alone-- a prompt will appear to update these for you when necessary. Then, enter the range of dates that this RateCard will be valid for in the Valid From and Valid Until date selectors. This will specify the expiry date of the prices you receive from your suppliers. You may use the panel on the lower half of the left-hand side of the window to enter notes on this RateCard, and to view the history of this RateCard.
On the right-hand side of the RateCard Manager Window, double click anywhere to open the Flexi-Spec Editor and write out the specifications for the item you are ordering. (Note: Currently the Detailed Job Specs editor is not available in the RateCard Manager, though it is planned to be included in a future update.) Once you have completed the specifications for this RateCard, click the Configure tab to continue to building the RFQ.
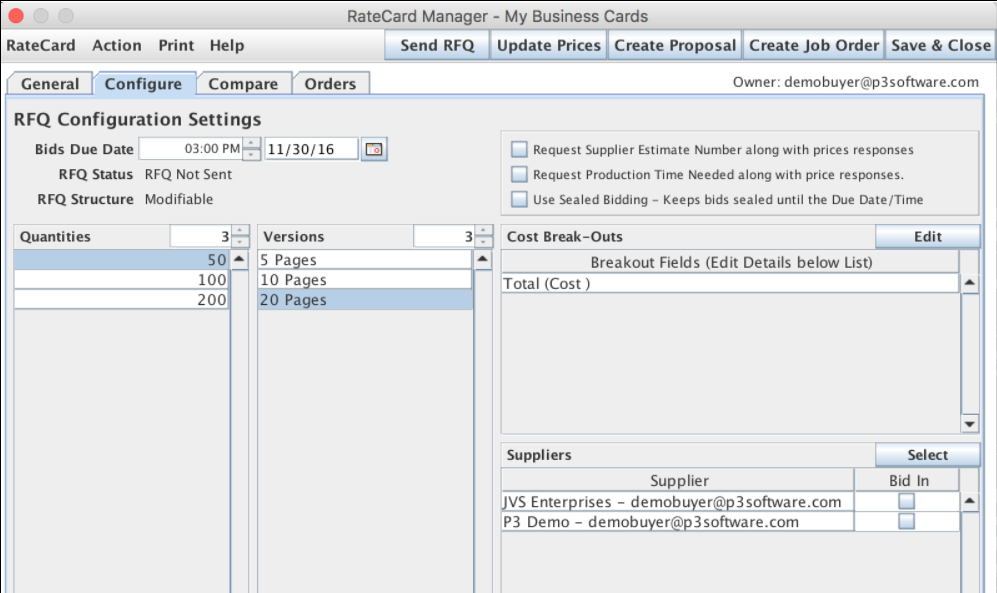
Once in the RFQ Configuration pane, you may set a due date and time for your suppliers' bids, select and enter a number of quantities, versions, and breakouts. Select a number of suppliers using the bottom-right panel. You may use the checkboxes in the upper left to request additional information in the RFQ or use sealed bidding. When you have finished entering this information, press the Send RFQ button along the top of the window to send out RFQs to your suppliers. This will lock the RFQ structure. Once you have received bids from your suppliers, you may continue to creating a job order or project proposal from a RateCard.
Using a RateCard
From the RateCard Manager
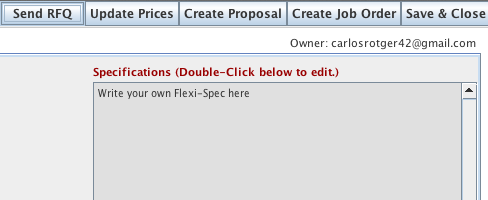
To put a RateCard to use, press either the Create Proposal or Create Job Order buttons along the top of the RateCard Manager. Selecting Create Proposal will create a project proposal with the pricing from your RateCard preloaded as options for your customer, and bring you to the Project Invoice Builder screen, where you can adjust your markup and proceed as normal. Selecting Create Job Order will allow you to select a bid and quantity, and proceed to the Job Order Window.
From the Job Master Window
In the Job Master Window, from the top menu items, select Actions --> Collect Prices. This will allow you load in the bids from your RateCard as if you had received them through the normal RFQ process, and then proceed as normal with the Job Work Flow.
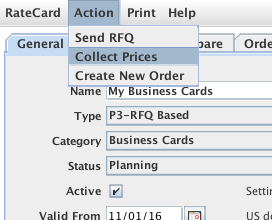
The RateCard option of the Job Master Window
RateCard Manager
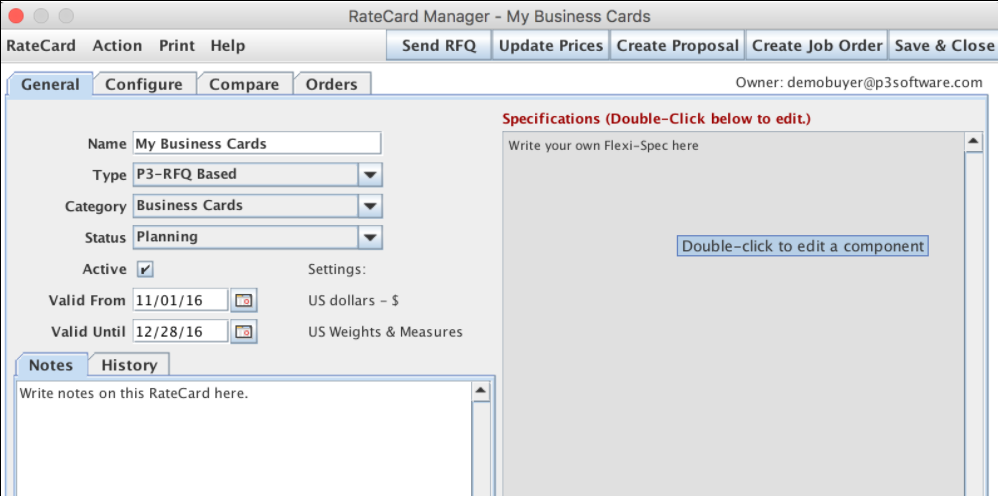
The RateCard Manager is the main interface for dealing with RateCards. It will allow you to create new RateCards, edit existing RateCards, and put RateCards to use. It may be accessed by selecting New RateCard or Open RateCard from the RateCards menu, or by double-clicking on one of the items in your RateCard List. This page will give an overview of the options available in the Manager. For information about RateCards in general, see the RateCards help page.
RateCard Manager Menus
RateCard
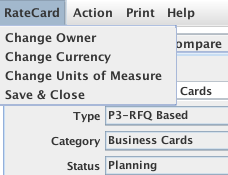
Change Owner
- Changes the Enterprise User of the current RateCard.
Change Currency
- Changes the currency used in the current RateCard. Note: It is not advisable to change the currency after RFQs have been sent, as this will invalidate your supplier's responses.
Change Units of Measure
- Changes the units of measure (i.e. US Weights, Centimeters, etc.) associated with the current RateCard.
Save & Close
- Saves the current RateCard and closes the RateCard Manager.
Action
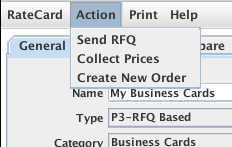
Send RFQ
- Sends the RFQ and specifications to some or all of the selected suppliers.
Collect Prices
- Updates the pricing information for this RateCard. Identical to pressing the Update Prices button.
Create New Order
- Creates a new job order using the current RateCard.
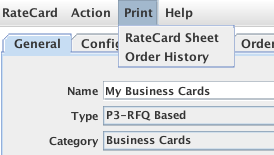
RateCard Sheet
- Exports the selected RateCard as either an .html document or .xls spreadsheet file.
Order History
- Prints the order history of the selected RateCard in either format.
The RateCard Manager Interface
The RateCard Manager interface has four tabs: General, Configure, Compare, and Orders, as well as five workflow buttons: Send RFQ, Update Prices, Create Proposal, Create Job Order, and Save & Close.
The General Tab

The General tab gives the basic organizational information about the RateCard: its name, categories, status, and timeframe. The General tab also has a text field for writing notes on the current RateCard, a pane for viewing the history of the RateCard (e.g. "Created 6/1/13," "RFQ Sent 6/3/13," etc.), and a Flexi-Spec Editor for writing the specifications of the current RateCard.
The Configure Tab
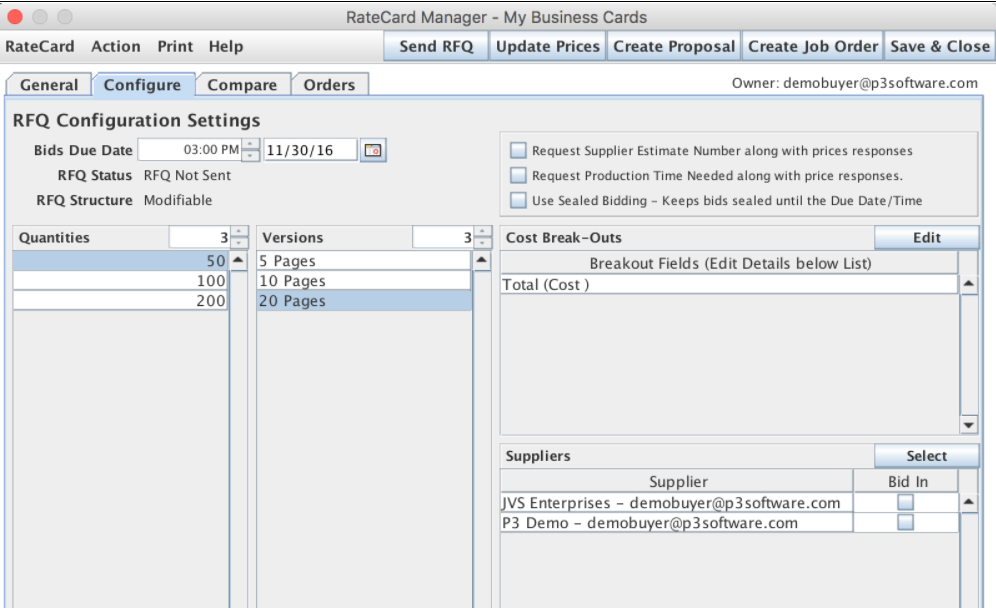
The Configure tab displays options for configuring your RFQs, including setting a bid due date, choosing quantities and versions, choosing suppliers, and advanced pricing options as shown on the right-hand side of the picture above.
The Compare Tab
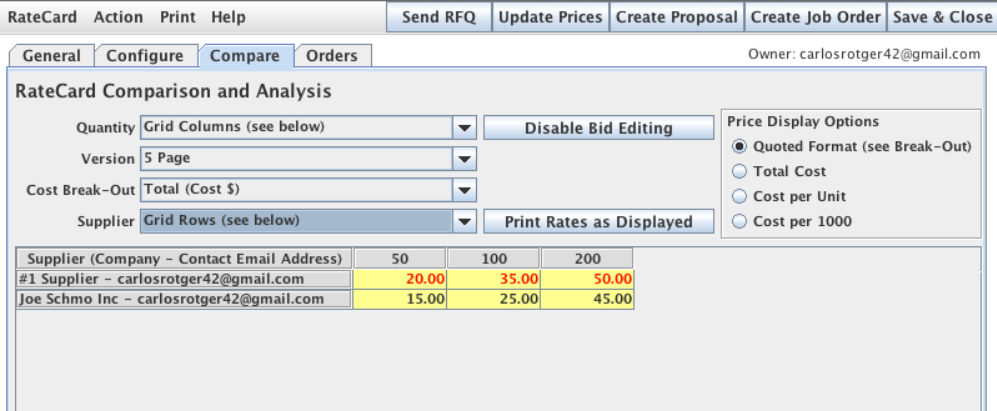
The Compare tab shows a table of pricing data from your suppliers. You can configure the table any way you wish, show different versions, or costs per unit by using the selectors and buttons near the top of the pane. You may also expor the pricing table as it appears to either an .html document or an .xls spreadsheet.
The Orders Tab
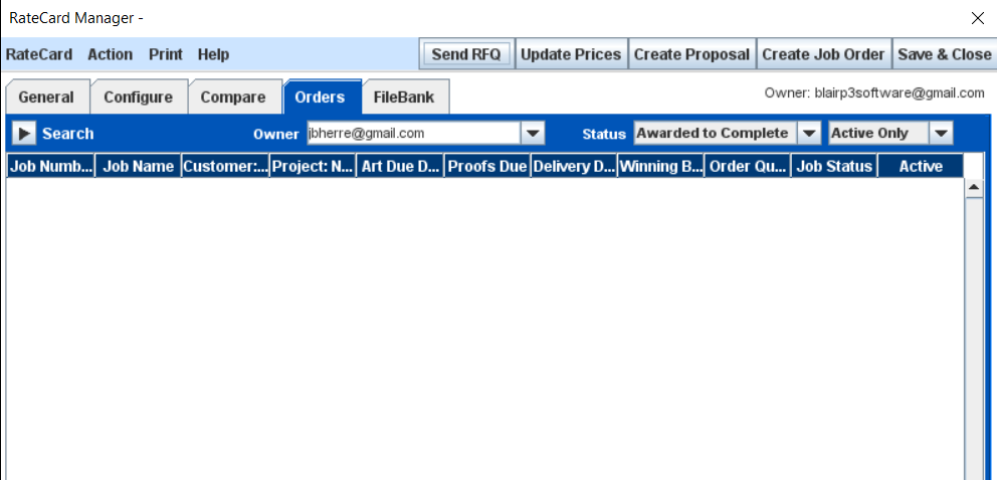
The Orders tab displays all the completed job orders made from the currently selected RateCard. You may filter the list using the fields at the top of the pane, and view a summary of the highlighted order by pressing the "+ Summary" button at the bottom of the window. To create a new job order, press the Create Job Order button along the top of the window.
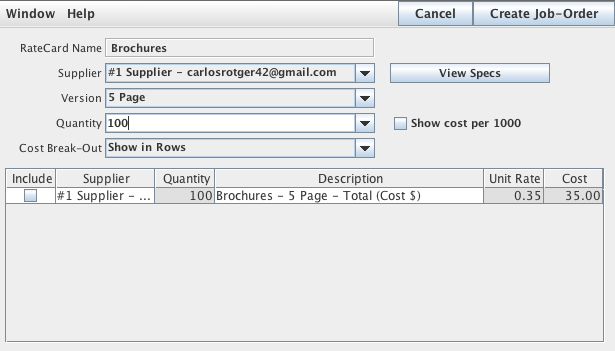
This will bring up the RateCard Job Order Creator window. From there you may award the job to one of your suppliers, pick a quantity or type in your own, and continue to the Job Master Window once you have finished.
RateCard List
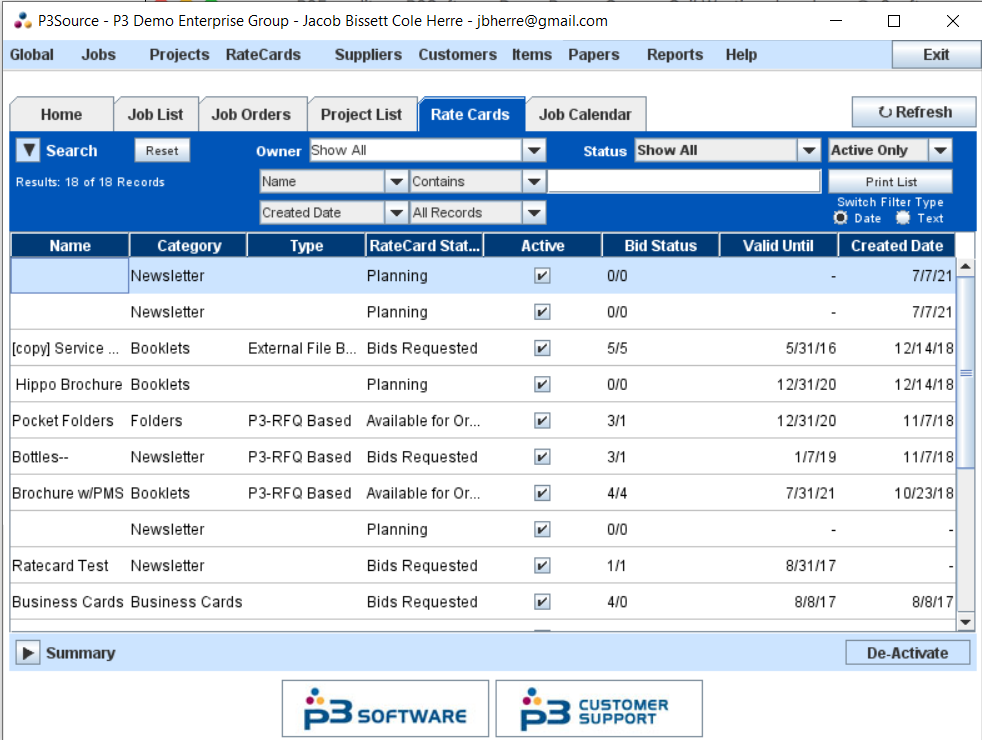
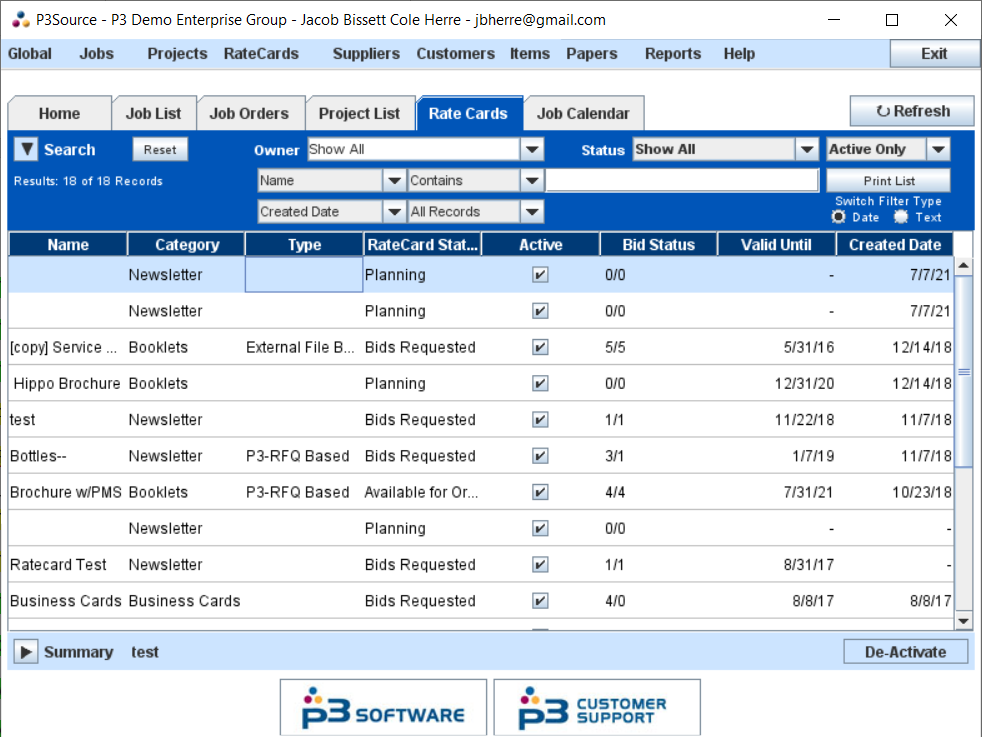 The RateCard List screen is accessed by clicking on the Rate Cards tab from the Main Application Window. You can see a RateCard's name, category, type, status, whether or not it is active, how many of its bids are in, and its timeframe. You can sort the list or filter it by using the fields near the top of the pane. Highlight a RateCard by clicking once on it and you may view a summary by pressing the "+ Summary" button. Double-click on a RateCard in the list to open in it in the RateCard Manager. From the RateCard List, you may set whether or not a RateCard is active by clicking on the Active displayed in each item of the list, or along the bottom of the pane when a RateCard is highlighted.
For general information about RateCards, see the RateCard help page.
For more detailed information about dealing with RateCards, see RateCard Manager.